Show a Sensor
Display a Home Assistant sensor (e.g. living room temperature) on an LVGL label.
The pattern - same for every sensor
Subscribe
homeassistant sensor
on_value
fires on every update
lvgl.label.update
push value to widget
Design a label in the LVGL designer
Place a Label widget on your canvas. This is where the sensor value will appear. Set some placeholder text like --.- °C so you can see it during design.
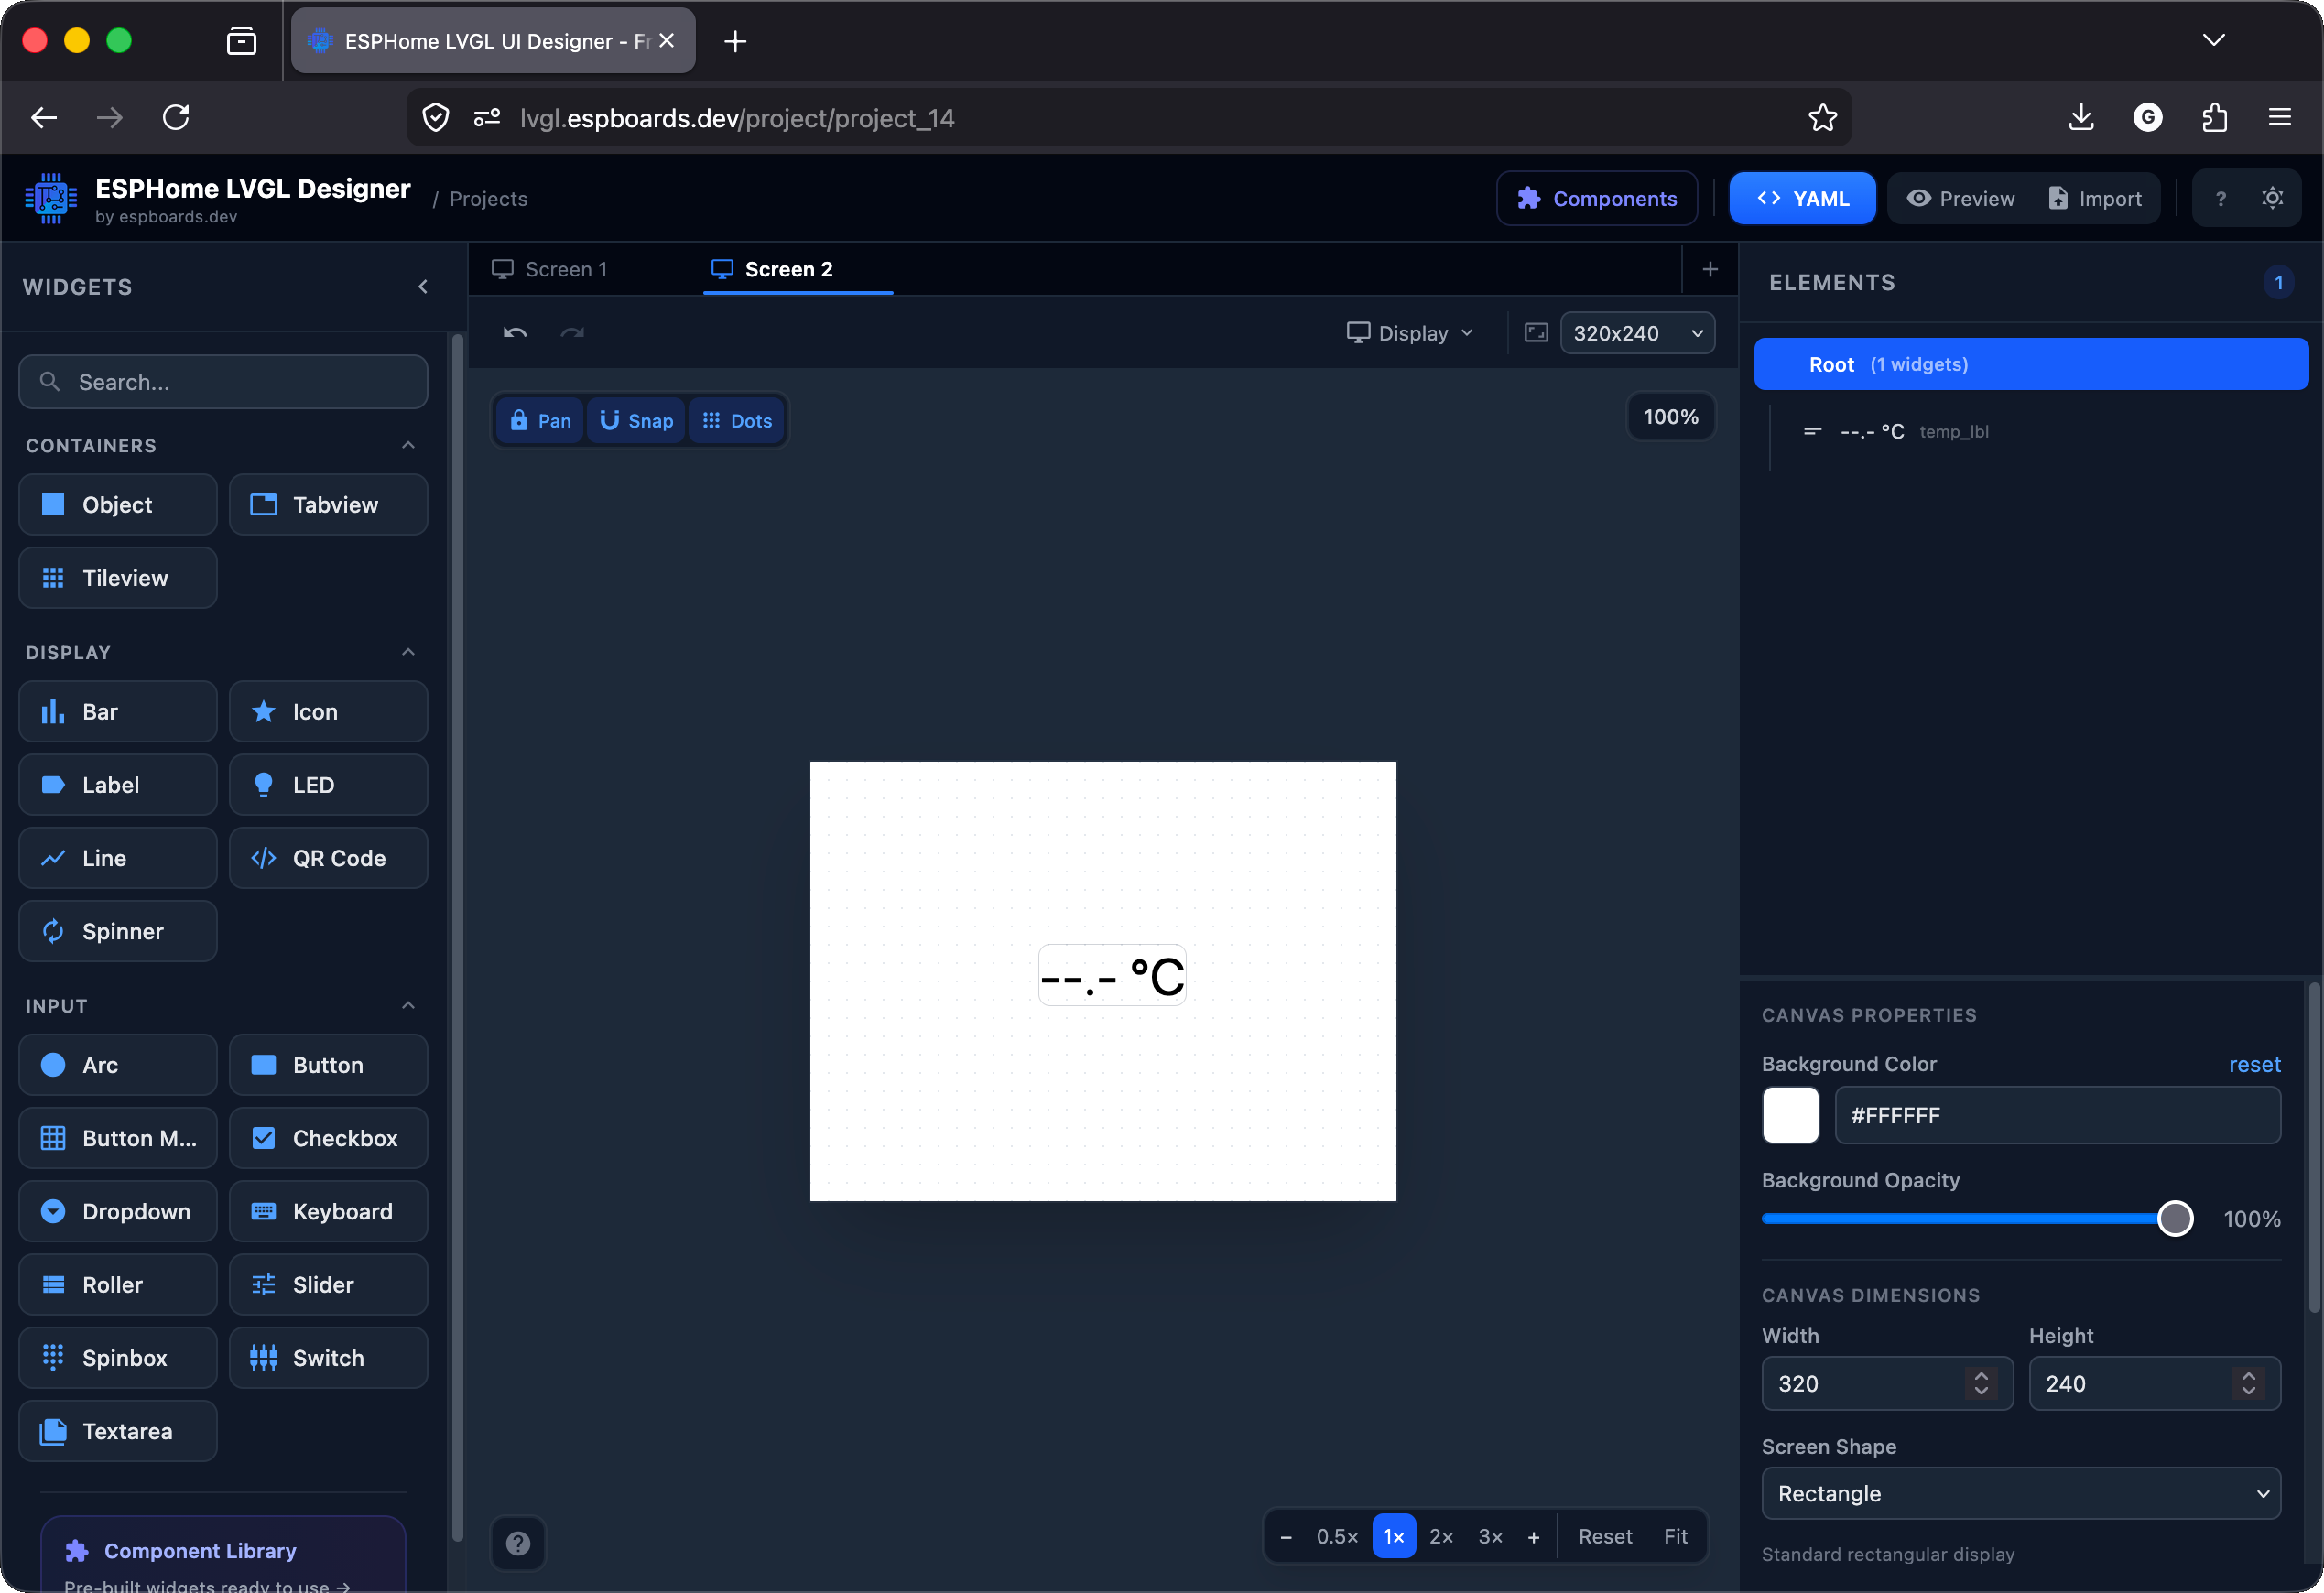
id: automatically (like lv_label_3). You'll use this ID in step 3 to tell ESPHome which widget to update. You can rename it to something meaningful like temp_lbl in the properties panel. Export the YAML and paste it into your config (same as Chapter 3). The key part is the id::
# Your LVGL widgets (from the designer or hand-written)
# The important thing: each widget needs an id:

lvgl:
  pages:
    - id: main_page
      bg_color: 0xFFFFFF
      pad_all: 0
      widgets:
        - label:
            id: temp_lbl
            x: -35
            y: -20
            align: CENTER
            text: "--.- °C"
            text_color: 0x000000
            text_font: montserrat_28
Find the entity ID in Home Assistant
Every sensor, switch, and light in Home Assistant has a unique entity_id. You need this to tell ESPHome which value to subscribe to.
Method A: Developer Tools
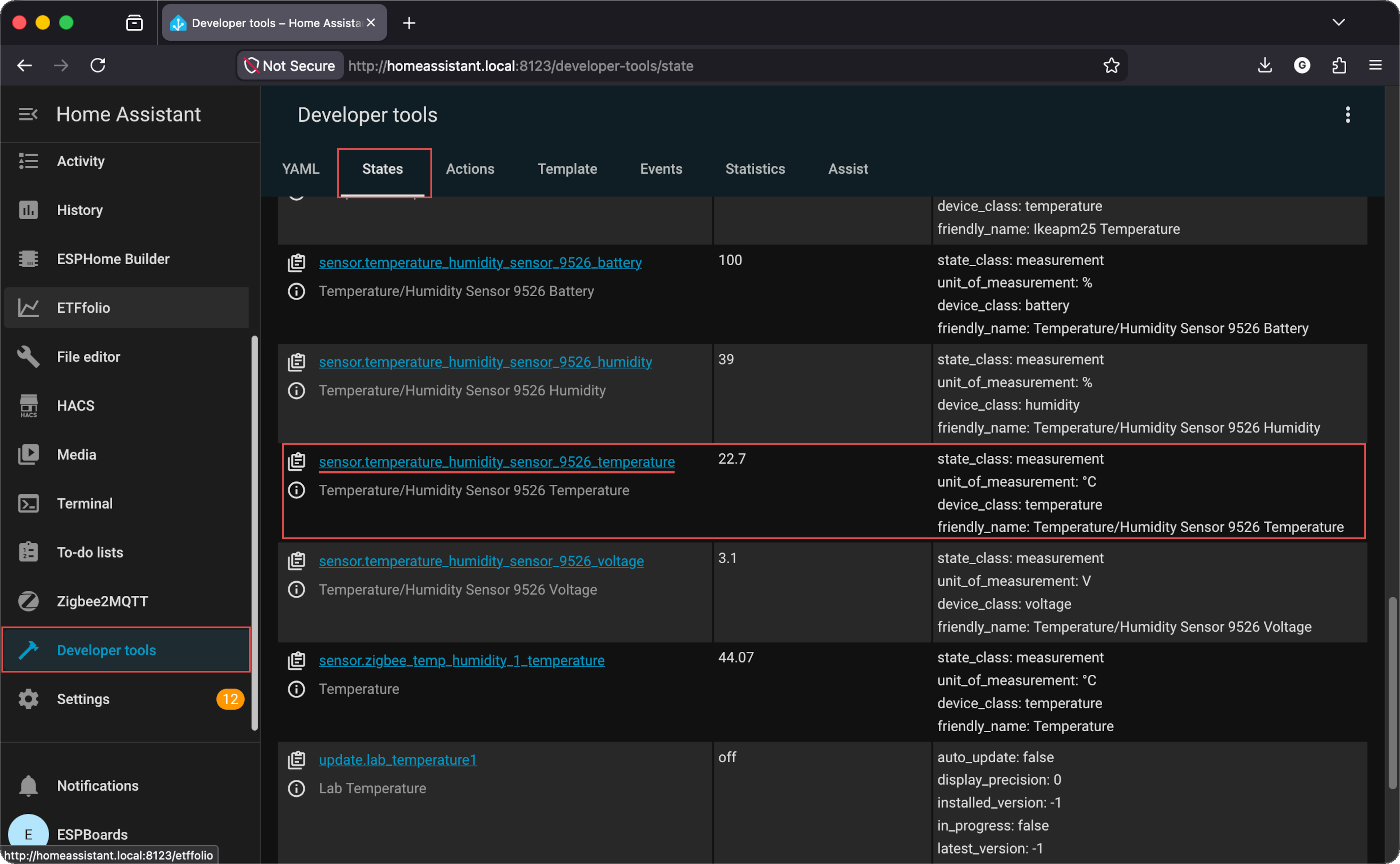
Easiest- In Home Assistant, go to Developer Tools (bottom of the sidebar)
- Click the States tab
- Type your sensor name in the search box (e.g. "living room temperature")
- The Entity column shows the ID:
sensor.living_room_temperature
Method B: From any dashboard card
Click any sensor card on your HA dashboard → click the ⚙ gear icon (top right) → the Entity ID is shown near the top. You can copy it directly.
Entity IDs follow this pattern: domain.name
In practice they can be long auto-generated strings like:
sensor.temperature_humidity_sensor_9526_temperature That's normal - HA auto-generates these from the device name. You can rename them in HA (Settings → Devices → click entity → edit Entity ID) to something friendlier like sensor.living_room_temperature. We'll use the short version in all examples.
Add the sensor block to your YAML
Add this at root level (same indentation as esphome:, wifi:, lvgl:). Replace the entity_id with yours from step 2.
# Add to your device YAML (root level, same as esphome: / wifi:)

sensor:
  - platform: homeassistant
    id: living_room_temp
    entity_id: sensor.living_room_temperature
    on_value:
      then:
        - lvgl.label.update:
            id: temp_lbl
            text: !lambda |-
              return str_sprintf("%.1f °C", x).c_str();
platform: homeassistantSubscribes to a HA entity via the APIentity_id:Which HA entity to watchon_value:Fires every time HA sends a new readinglvgl.label.update:Pushes the value to your LVGL label (matched by id:)xThe lambda variable holding the sensor's current valueUpdate multiple widgets from one sensor (label + arc)
Add more actions inside the same on_value:. For example, update a label and an arc at the same time:
# Want to update multiple widgets from one sensor?
# Add more actions inside the same on_value:

sensor:
  - platform: homeassistant
    id: living_room_temp
    entity_id: sensor.living_room_temperature
    on_value:
      then:
        - lvgl.label.update:
            id: temp_lbl
            text: !lambda |-
              return str_sprintf("%.1f °C", x).c_str();
        - lvgl.arc.update:
            id: temp_arc
            value: !lambda 'return (int) x;'
Showing text values (weather, states, names)
For entities that return strings instead of numbers, use text_sensor::
# For text-based entities (weather conditions, states, etc.)
# use text_sensor: instead of sensor:

text_sensor:
  - platform: homeassistant
    id: weather_condition
    entity_id: weather.home
    attribute: condition
    on_value:
      then:
        - lvgl.label.update:
            id: weather_lbl
text: !lambda 'return x.c_str();'id: in lvgl.label.update must be identical to the id: on your LVGL widget - they're case-sensitive. If they don't match, nothing updates and there's no error message. Flash and see it live
In the ESPHome dashboard: click your device → Install → Wirelessly. Within a second of the sensor changing in HA, your label updates on screen.
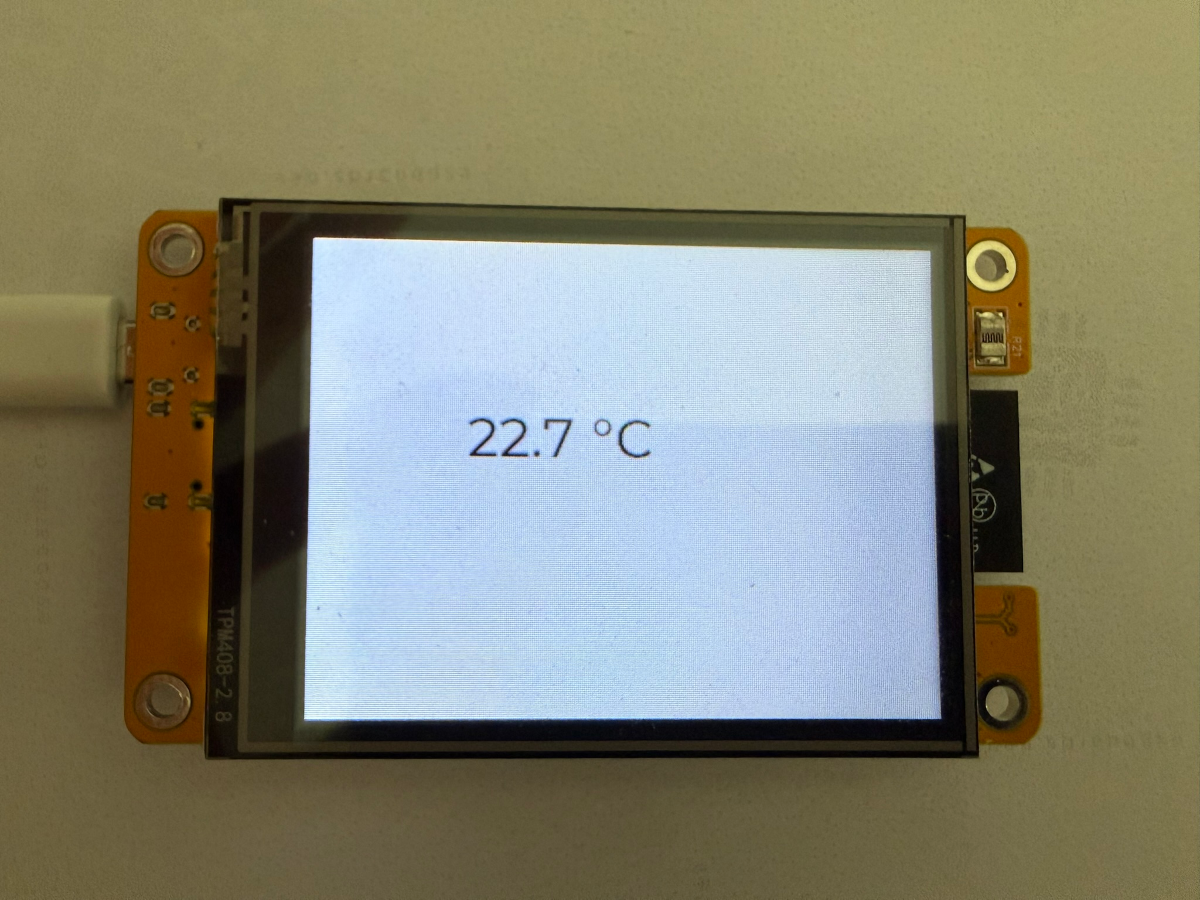
[I][homeassistant.sensor:015]:
'sensor.living_room_temperature':
State: 22.5
[D][lvgl:034]: label update:
id: temp_lbl → "22.5 °C"
Checkpoint - Does the label update when the sensor value changes in HA?
If yes - you've crossed into live data. The same pattern works for arcs, bars, gauges, anything with an update action.