DHT22 Temperature/Humidity
Wire a DHT22 to your ESP32 and stream temperature & humidity to LVGL.
The pattern - same for any local sensor
ESP32 reads sensor
update_interval: 10s
on_value
fires with new reading
lvgl.label.update
push to widget
No Home Assistant needed - the sensor runs entirely on the ESP32. Works with both DHT11 and DHT22.
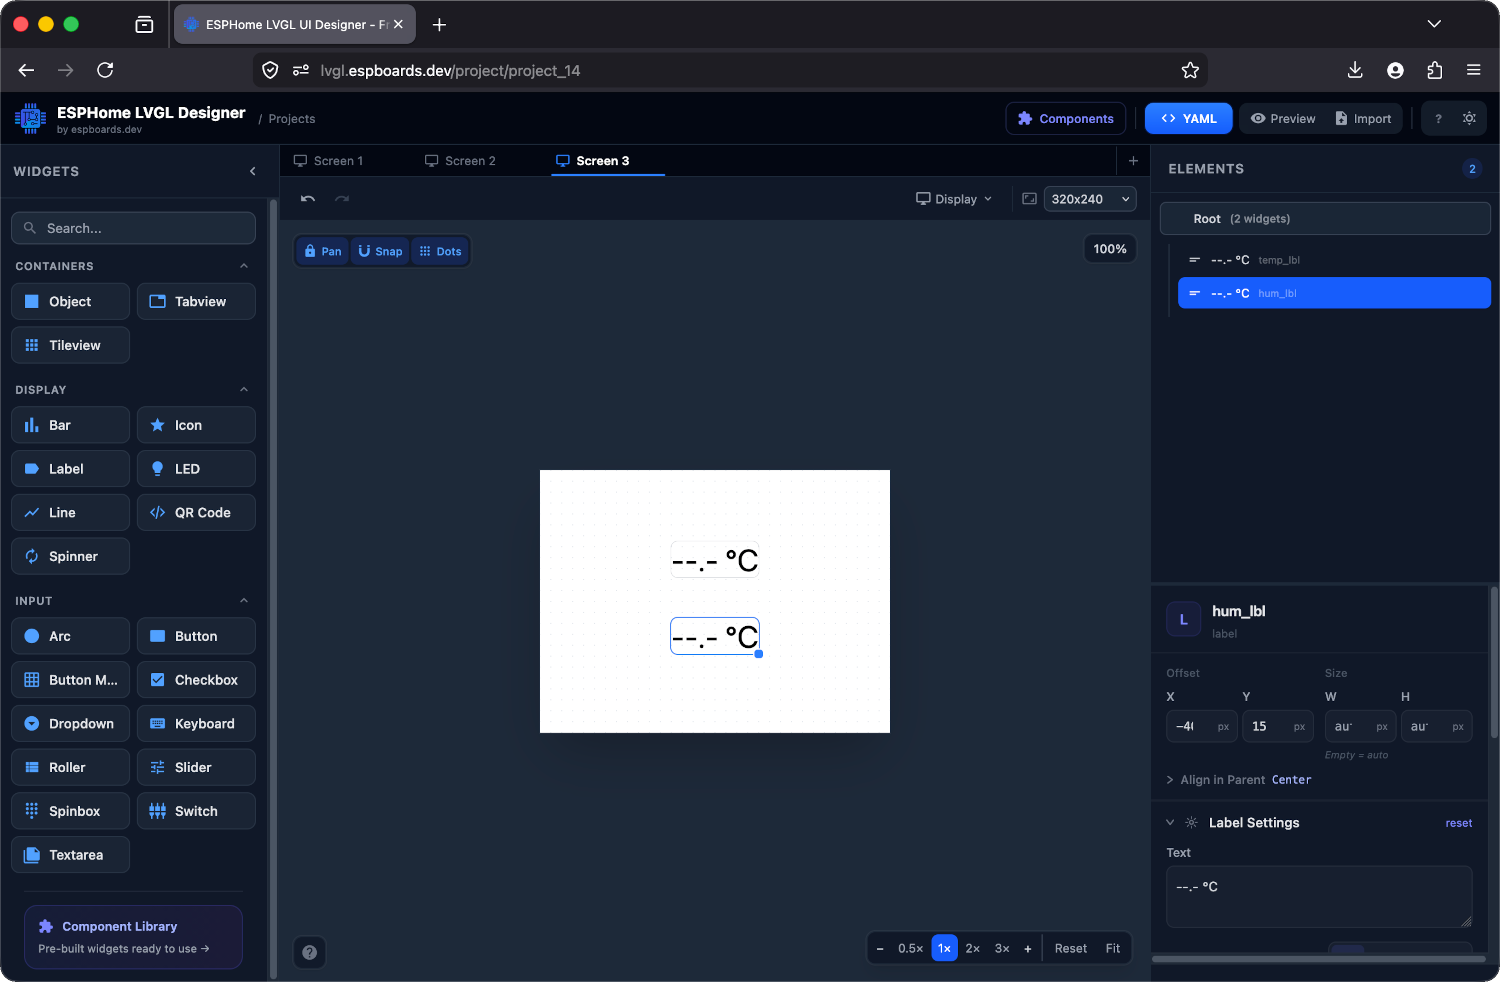
Design labels for temp + humidity
Place two Label widgets in the designer - one for temperature, one for humidity. Give them IDs like temp_lbl and hum_lbl. Set the default text to placeholder values so you can see them on the canvas.
# Your LVGL widgets (from the designer)
lvgl:
pages:
- id: canvas_130
bg_color: 0xFFFFFF
pad_all: 0
widgets:
- label:
id: temp_lbl
x: -40
y: -55
align: CENTER
text: "--.- °C"
text_font: montserrat_28
- label:
id: hum_lbl
x: -40
y: 15
align: CENTER
text: "--.- %"
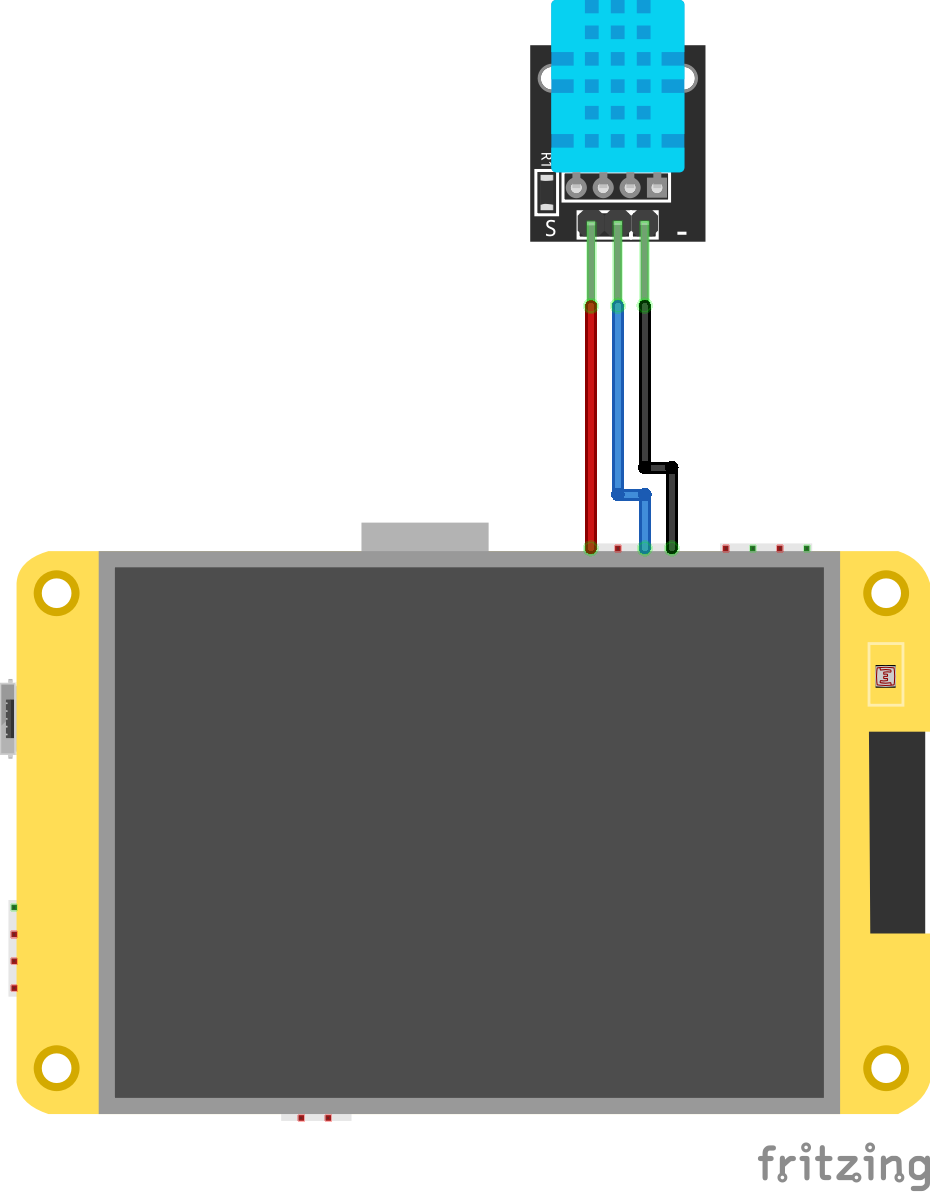
text_font: montserrat_28Wire the DHT11
We're using a DHT11 board module (3 pins). The pull-up resistor is built into the board - just three wires, no extra components.
on_value trigger, so you can update different widgets independently. Using a DHT22? Just change model: DHT11 to model: DHT22 - everything else stays the same. Add the sensor YAML
# Add at root level of your device YAML

sensor:
  - platform: dht
    pin: GPIO4
    model: DHT11
    update_interval: 10s
    temperature:
      id: room_temp
      name: "Room Temperature"
      on_value:
        then:
          - lvgl.label.update:
              id: temp_lbl
              text: !lambda |-
                return str_sprintf("%.1f °C", x).c_str();
    humidity:
      id: room_hum
      name: "Room Humidity"
      on_value:
        then:
          - lvgl.label.update:
              id: hum_lbl
              text: !lambda |-
                return str_sprintf("%.0f %%", x).c_str();
platform: dhtBuilt-in ESPHome DHT driver - no extra libraries neededupdate_intervalHow often to read - 10s is responsive, 60s saves powername:Also publishes to Home Assistant automatically - free dashboard tileUpdate an arc alongside the label
# Update an arc alongside the label

sensor:
  - platform: dht
    pin: GPIO4
    model: DHT11
    update_interval: 10s
    humidity:
      id: room_hum
      on_value:
        then:
          - lvgl.label.update:
              id: hum_lbl
              text: !lambda 'return str_sprintf("%.0f %%", x).c_str();'
          - lvgl.arc.update:
              id: hum_arc
              value: !lambda 'return (int) x;'
Flash and breathe on it
Flash OTA. Wait 10 seconds for the first reading. Breathe on the sensor - humidity should jump.
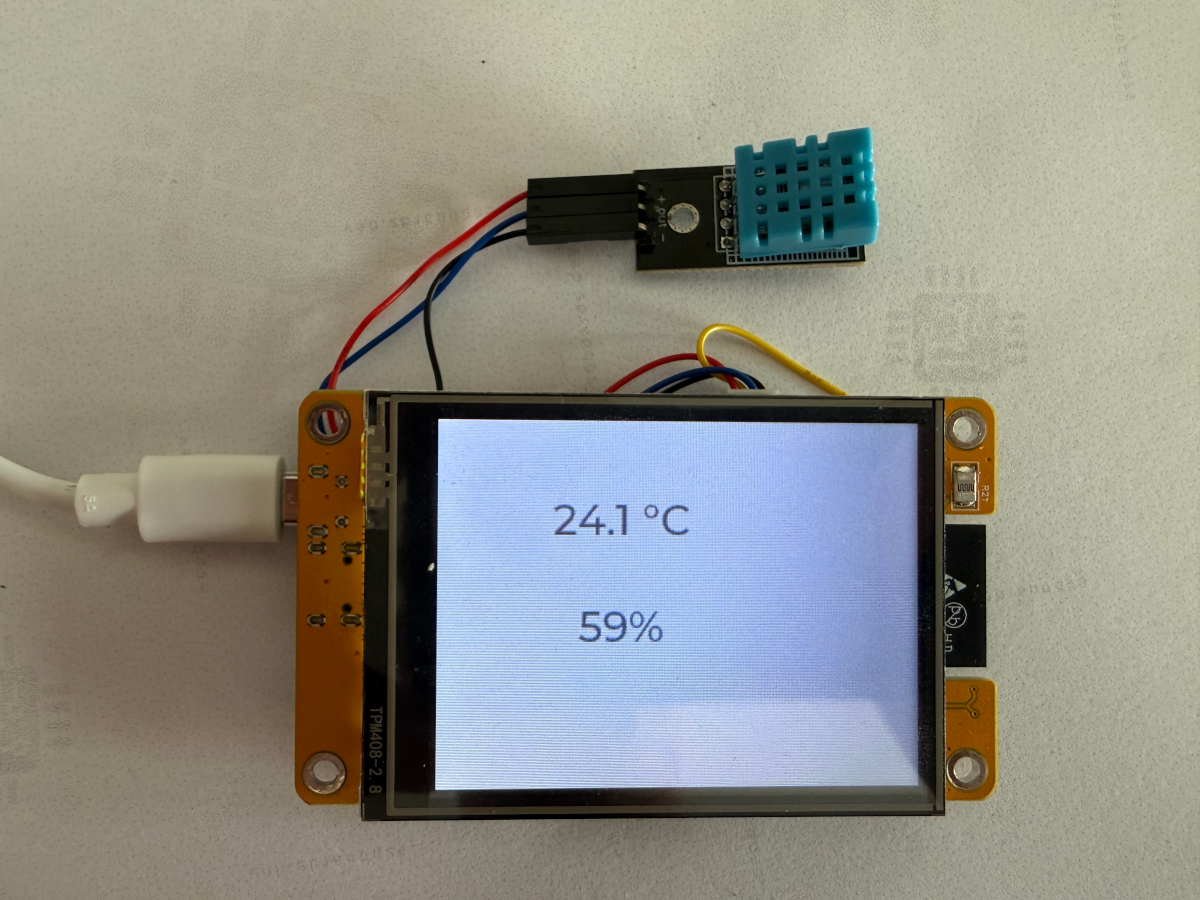
[D][dht:048]: Got temperature=24.0°C
[D][dht:048]: Got humidity=55.0%
[D][lvgl]: temp_lbl → "24.0 °C"
[D][lvgl]: hum_lbl → "55 %"
Checkpoint - Do the temperature and humidity labels update every 10 seconds?
If yes - you've got a live local sensor. The same on_value pattern works for any ESPHome sensor platform.