BMP280 Pressure
Wire a BMP280 over I²C and display pressure on an LVGL bar.
The pattern - same for any I²C sensor
I²C bus reads chip
update_interval: 30s
on_value
fires with new reading
lvgl.label.update
push to widget
I²C is a shared bus - you can add BMP280, SHT3x, OLED, and more on the same two wires.
Design labels for temp + pressure
Two labels: one for temperature (temp_lbl), one for pressure (press_lbl).
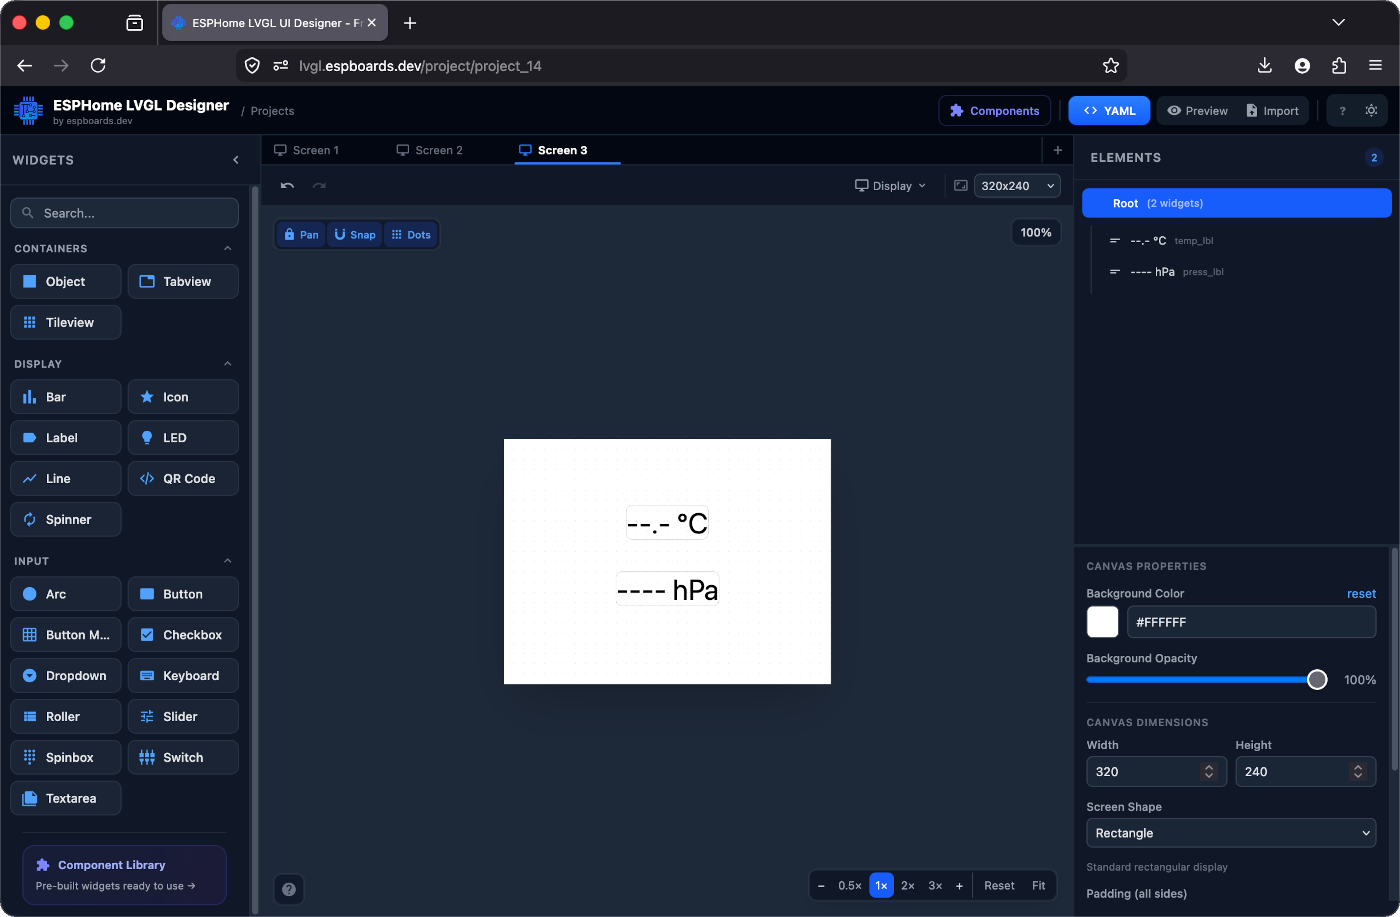
# Your LVGL widgets (from the designer)

lvgl:
  pages:
    - id: canvas_3
      bg_color: 0xFFFFFF
      pad_all: 0
      widgets:
        - label:
            id: temp_lbl
            x: -40
            y: -55
            align: CENTER
            text: "--.- °C"
            text_color: 0x000000
            text_font: montserrat_28

        - label:
            id: press_lbl
            x: -20
            y: 10
            align: CENTER
            text: "---- h"
            text_color: 0x000000
            text_font: montserrat_28
Wire the BMP280
Four wires. SDA and SCL are the I²C bus - they're shared, so you can daisy-chain other I²C sensors on the same pins.
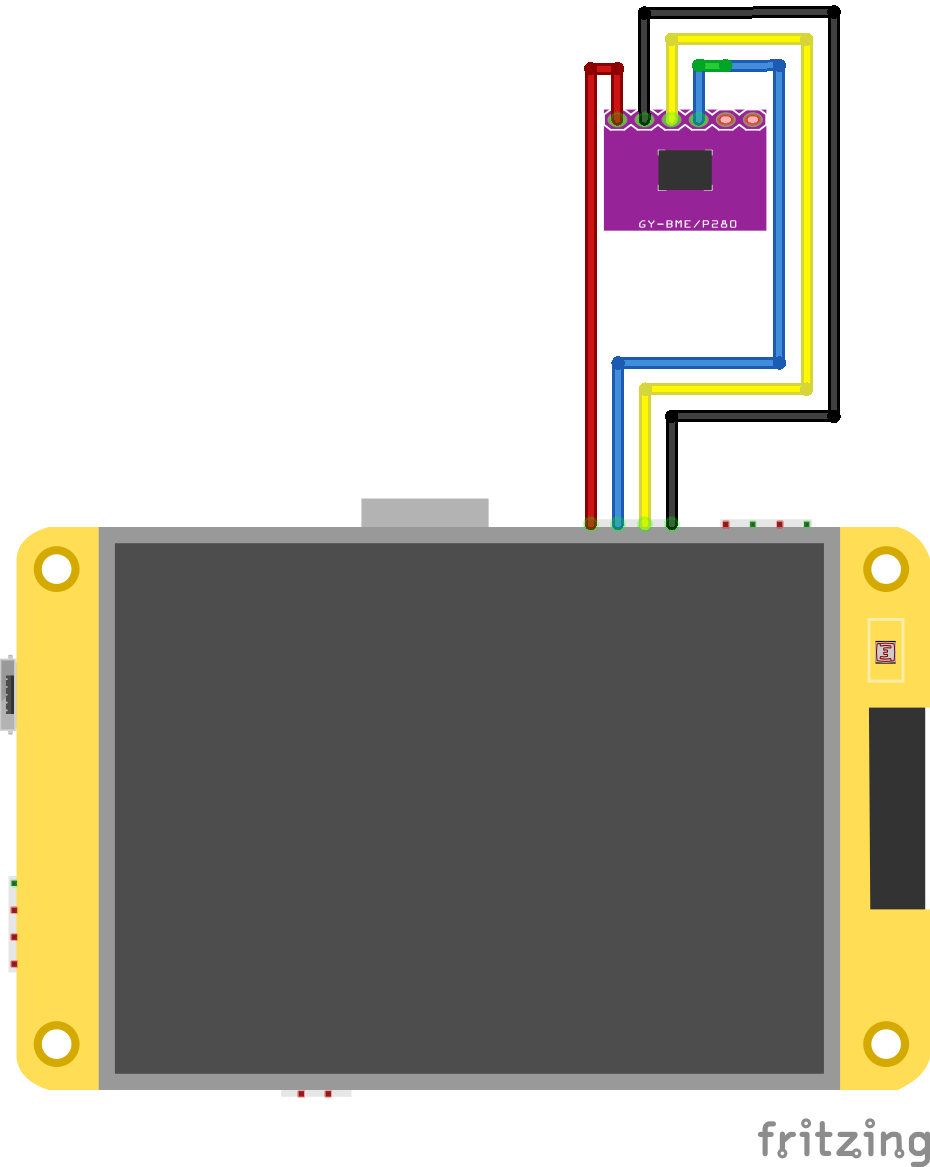
0x14/0x38/0x5D - no conflict with BMP280's 0x76/0x77. Add the sensor YAML
# Add at root level of your device YAML

i2c:
  sda: GPIO27
  scl: GPIO22
  scan: true   # logs detected addresses on boot

sensor:
  - platform: bmp280_i2c
    address: 0x76    # try 0x77 if 0x76 doesn't respond
    update_interval: 30s
    temperature:
      id: bmp_temp
      name: "Outside temperature"
      on_value:
        then:
          - lvgl.label.update:
              id: temp_lbl
              text: !lambda |-
                return str_sprintf("%.1f °C", x).c_str();
    pressure:
      id: bmp_press
      name: "Outside pressure"
      on_value:
        then:
          - lvgl.label.update:
              id: press_lbl
              text: !lambda |-
return str_sprintf("%.0f hPa", x).c_str();i2c:Initializes the I²C bus - only needed once even with multiple I²C sensorsscan: trueLogs all detected I²C addresses on boot - remove after confirmingaddress: 0x76Most BMP280 boards. Try 0x77 if 0x76 doesn't respondscan: true and check the boot log. ESPHome will print every I²C address it finds - you'll see your BMP280 and any other I²C devices. Flash and watch
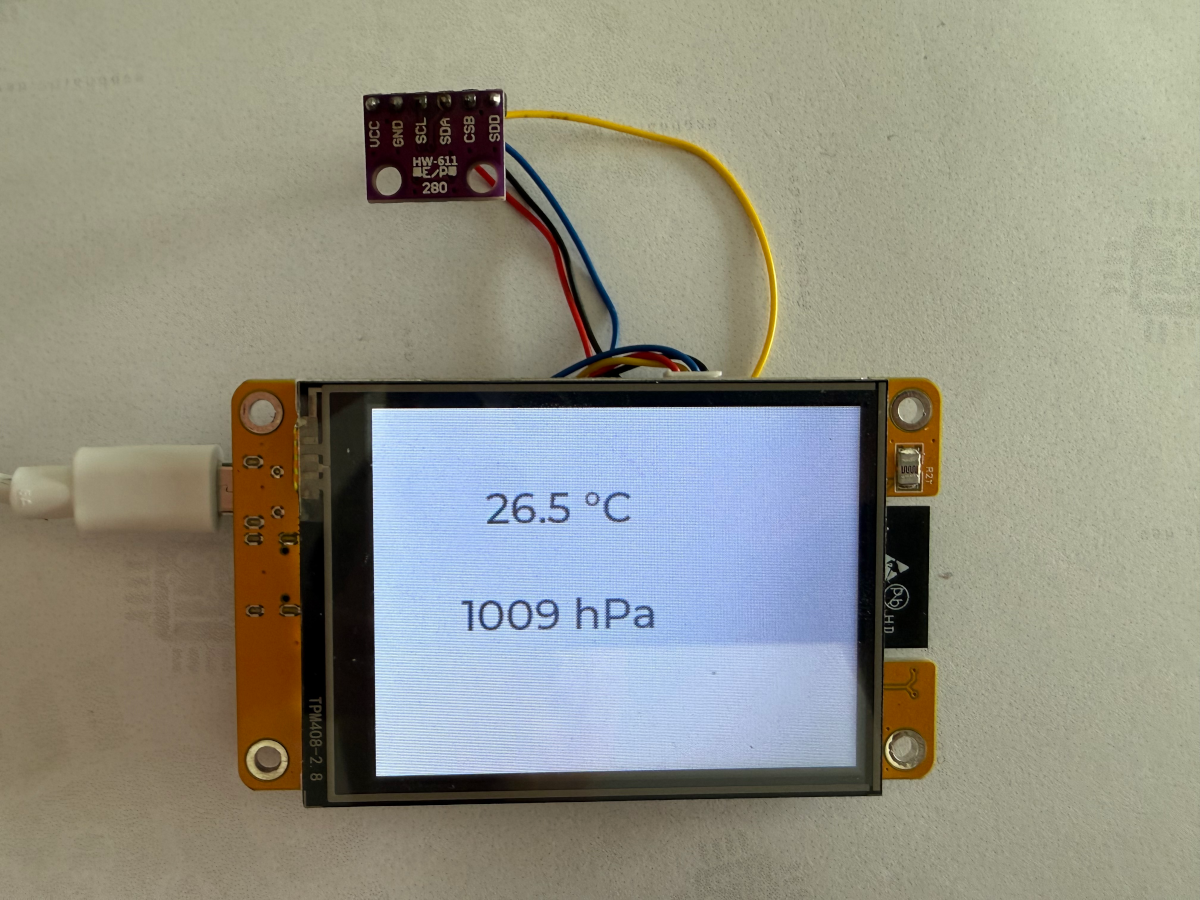
[I][i2c]: Found device at 0x76
[D][bmp280]: Got temp=23.1°C
[D][bmp280]: Got press=1013.2hPa
[D][lvgl]: temp_lbl → "23.1 °C"
[D][lvgl]: press_lbl → "1013 hPa"
Checkpoint - Do the boot logs show BMP280 detected, and do the labels update?
If yes - you have a working I²C sensor. Add BME280, SHT3x, or any other I²C device the same way on the same bus.